
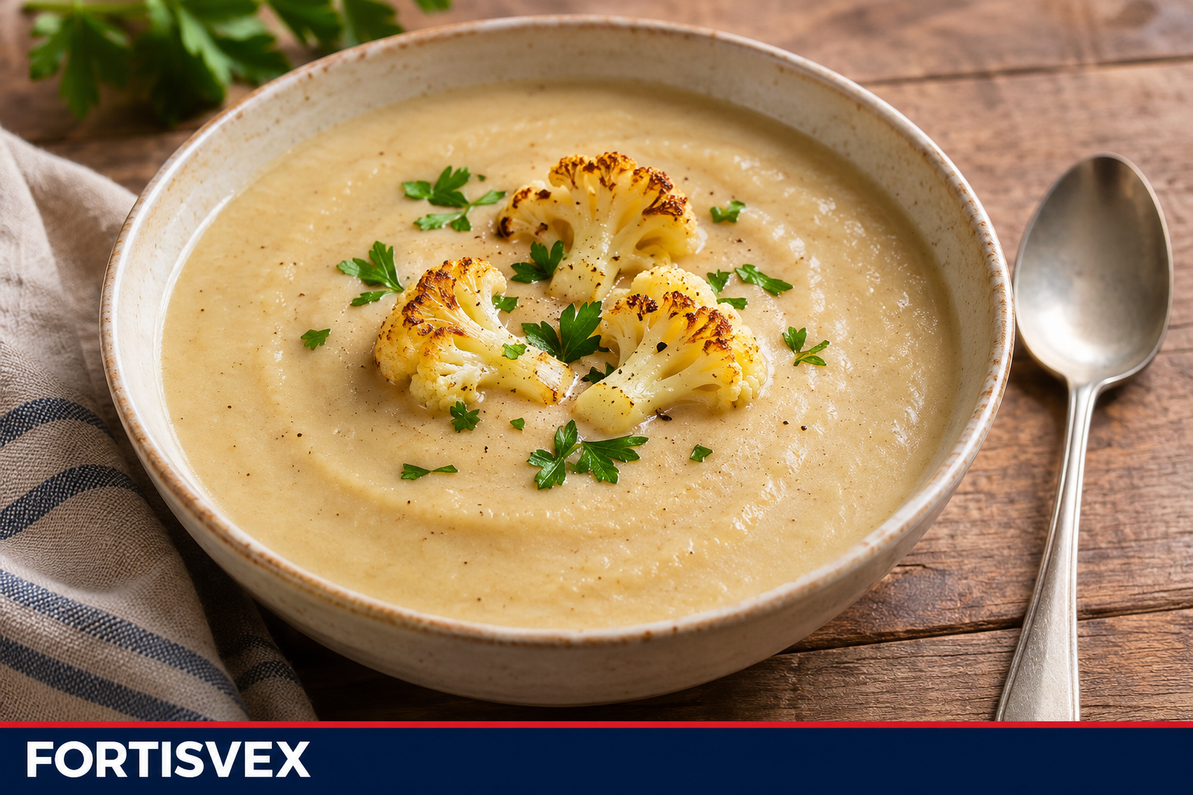
Roasted Cauliflower and White Bean Soup
FORTISVEX · RECIPES
Golden roasted cauliflower gives this smooth soup its flavor; blended white beans give it body without a cream base.
The most useful step happens before the soup pot comes into play: let the cauliflower develop golden cut surfaces in the oven. A little color gives the finished bowl more depth than simply simmering every ingredient together. Keep the florets small enough to soften through, and leave room on the tray so the pieces roast rather than sit in their own moisture.
This is a cauliflower-led soup, not a chunky bean stew. For a chunkier white-bean option, try creamy corn and white bean chowder. Cannellini beans disappear into the blended base, while a few reserved florets make the topping recognizable. Lemon goes in at the end, a little at a time, so it brightens the vegetables without turning the soup sharply sour.
Roasted Cauliflower and White Bean Soup
Yield: About 7–8 cups; 4 generous or 6 smaller servings
Prep: About 20 minutes
Cooking: About 45–55 minutes, with overlapping steps
Total: About 65–75 minutes
Oven: 425°F (220°C), conventional. Times are planning estimates; use the tenderness checks below.
Equipment
A large rimmed baking sheet, cutting board, knife, measuring cups and spoons, a 4- to 5-quart soup pot, spatula and an immersion blender. A countertop blender rated for hot liquids can be used instead, following its manufacturer's instructions. Have shallow containers ready if saving leftovers.
Ingredients
- 1 large head cauliflower, trimmed into about 1½-inch florets, with tender stems thinly sliced: about 1¾ pounds (800 g) prepared
- 3 tablespoons olive oil, divided
- 1 medium yellow onion, diced, about 1½ cups
- 3 garlic cloves, finely chopped
- ½ teaspoon dried thyme
- 2 cans cannellini beans, 15 ounces each, drained and rinsed, about 3 cups drained
- 4 cups lower-sodium vegetable broth, plus up to 1 cup water as needed
- ½ teaspoon fine salt, divided, plus more to taste
- ¼ teaspoon ground black pepper, plus more to taste
- 1 tablespoon fresh lemon juice, then more to taste if needed
- 2 tablespoons chopped fresh flat-leaf parsley, optional, for serving
Use US cups and spoons. Prepared vegetable weights and the finished yield are approximate. The broth and beans contribute different amounts of salt depending on the brand, so make the final seasoning adjustment after blending.
Method
- Prepare the cauliflower. Preheat the oven to 425°F (220°C), with a rack near the middle. Wash your hands and rinse the cauliflower before cutting. Remove leaves and the tough end of the core; thinly slice tender stems so they cook alongside the florets. Dry the pieces well.
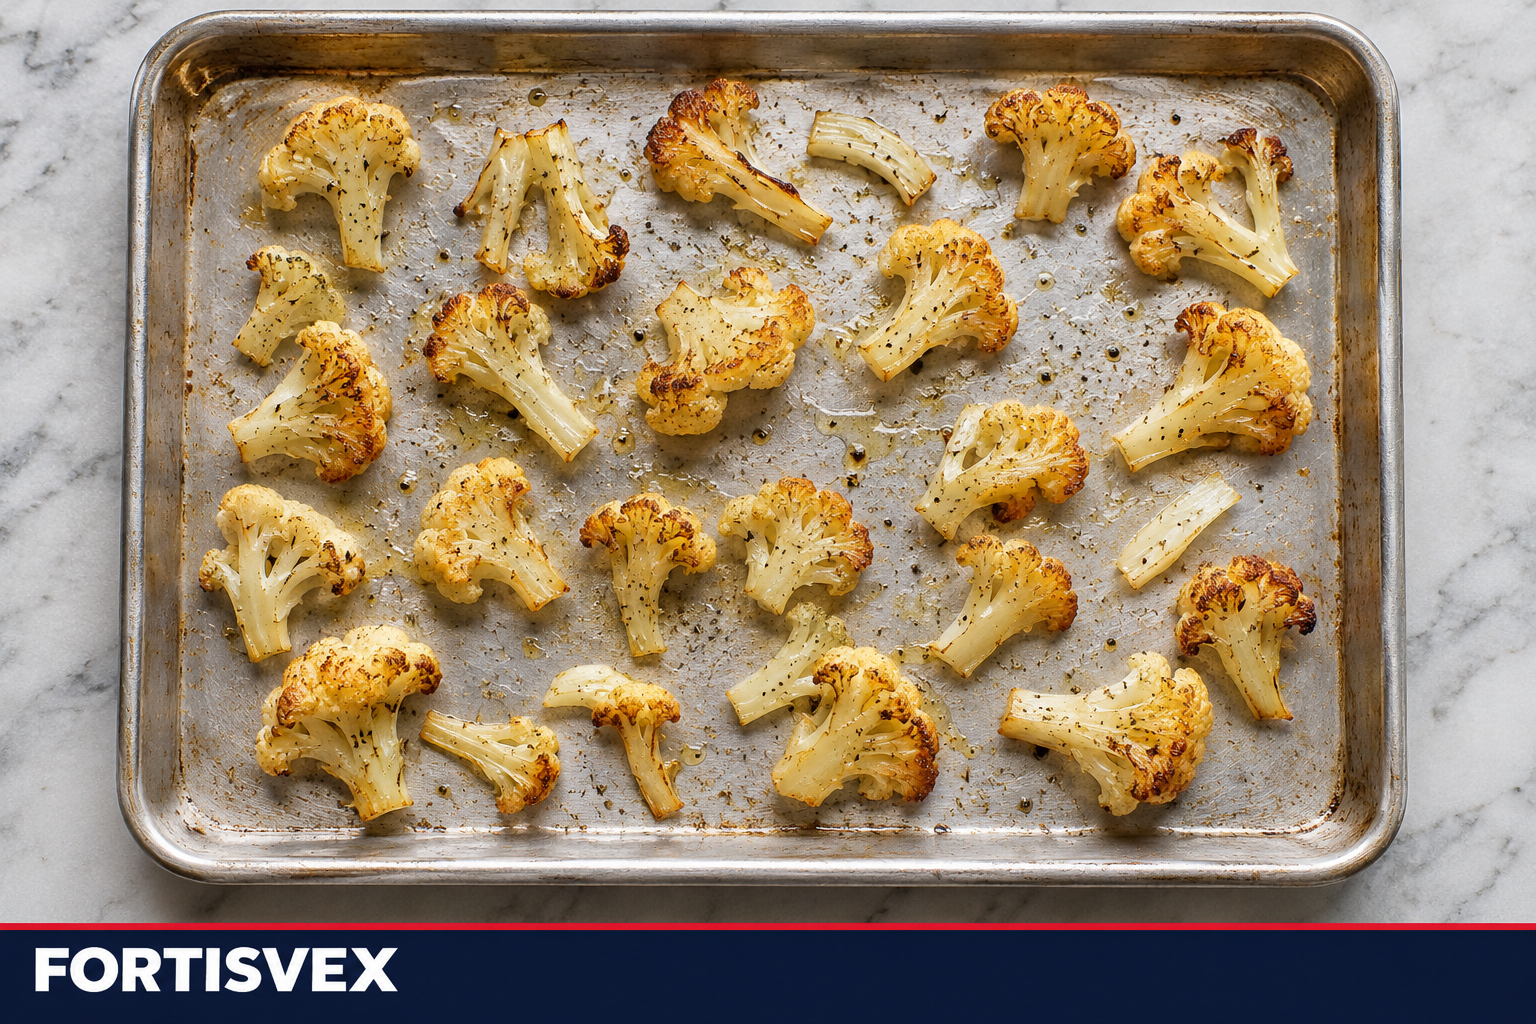
- Roast until tender and golden. Toss the prepared cauliflower with 2 tablespoons olive oil, ¼ teaspoon salt and the black pepper. Spread over the rimmed sheet in one layer, with some cut faces against the metal. If the pieces overlap substantially, use two trays and rotate them during cooking. Roast for about 25–35 minutes, turning once, until a fork enters the thickest stems easily and several cut surfaces are golden brown. Start checking early if your pieces are small. Dark tips alone do not mean the stems are ready.
- Soften the onion. While the cauliflower roasts, warm the remaining tablespoon of oil in the soup pot over medium heat. Add the onion and remaining ¼ teaspoon salt. Cook for about 7–10 minutes, stirring, until softened rather than deeply browned. Add the garlic and thyme and stir for about 1 minute. Lower the heat if the garlic starts to color.
- Simmer the base. Add the drained beans and 4 cups broth. Bring to a gentle simmer. When the cauliflower is ready, reserve about 1 cup of small florets for the topping and add the rest to the pot. Simmer gently for about 10 minutes, until the vegetables are very tender. If the pot is becoming too thick to simmer comfortably, add a small splash of water.
- Blend carefully. Take the pot off the heat. For an immersion blender, keep the blade head fully submerged while running it, move slowly, and switch it off before lifting it out. Follow the appliance instructions. If using a countertop blender, let the soup cool enough for that appliance, work in small batches below its hot-liquid fill limit and vent the lid as directed. Never blend hot soup in a sealed personal blender cup. Return the blended soup to the pot.
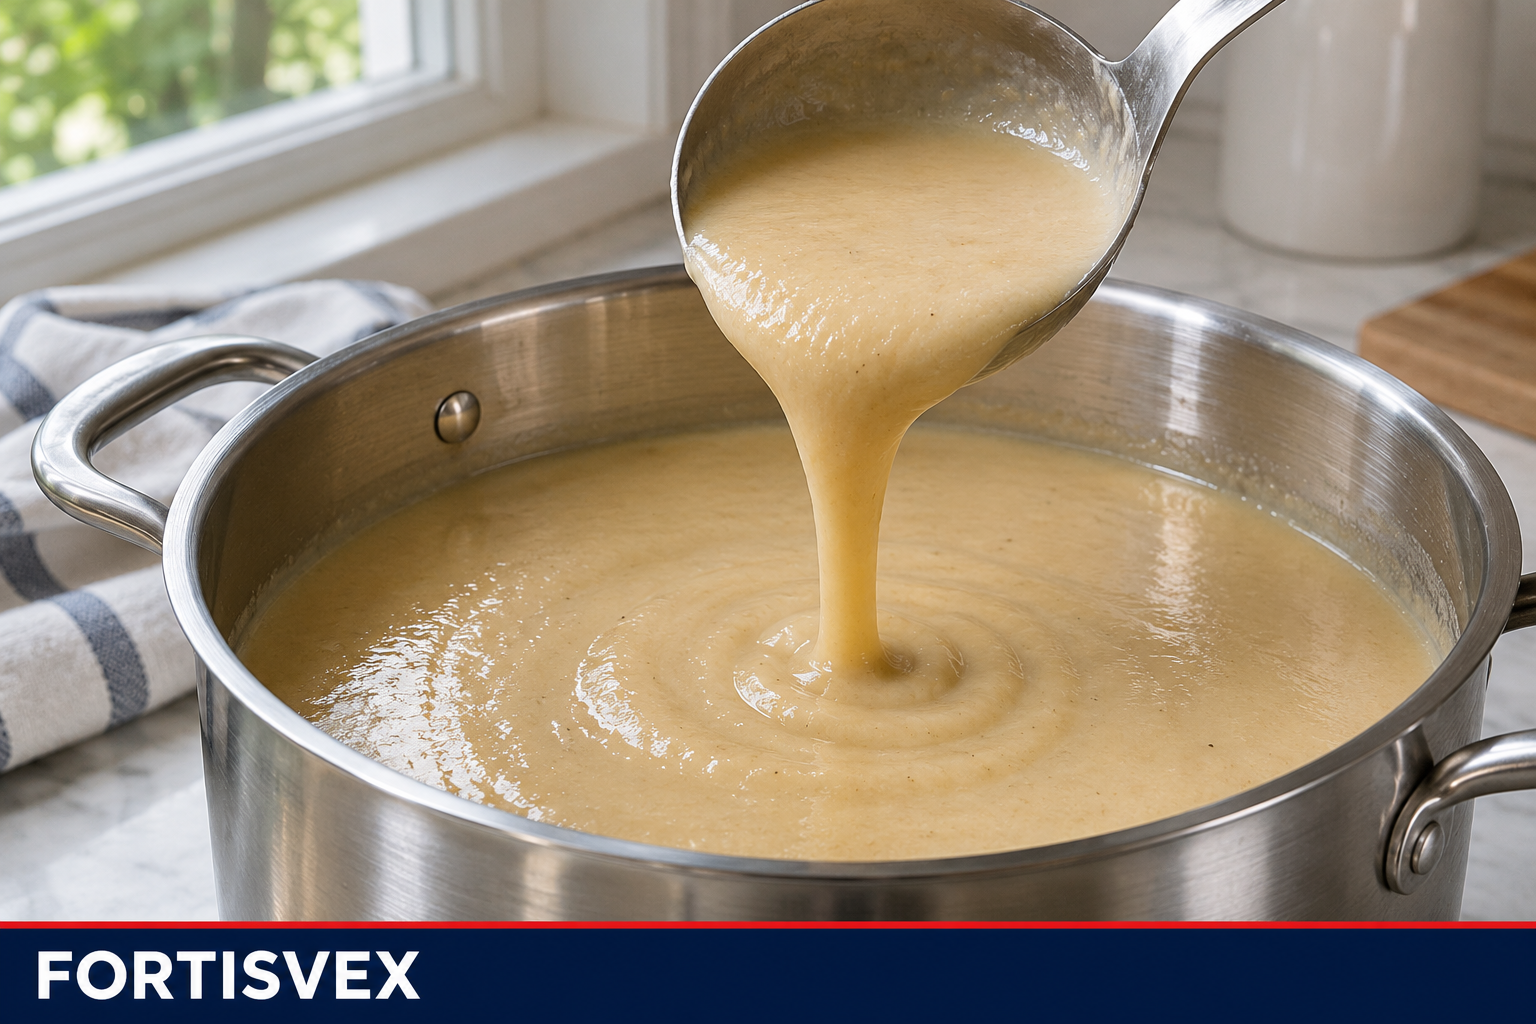
- Adjust and serve. Stir in the lemon juice. Add water a little at a time, up to about 1 cup, until the soup pours easily from a ladle rather than falling in stiff dollops. Warm gently while stirring. Taste before adding more salt, pepper or lemon. Divide into bowls and top with the reserved cauliflower and optional parsley. Serve promptly.
Three decisions that change the bowl
Brown some surfaces, not every surface
Cauliflower can have browned tips while the thick stems remain firm. Test one of the largest pieces with a fork before taking the tray out. If it needs more time, turn any very dark pieces and keep checking. Remove small pieces that finish early. Burnt, bitter edges will not disappear when blended, so do not deliberately blacken the tray.
For a cauliflower main with more bite, try charcoal-kettle cauliflower steaks with lemon-caper dressing.
Choose the final thickness after blending
Cauliflower heads vary in size, and drained cans do not all contain the same amount of beans. Starting with the specified broth and adding water at the end makes the consistency easier to control. For a thick but spoonable soup, stop adding water when it flows from the ladle. If it becomes thinner than you intended, simmer uncovered briefly while stirring rather than adding flour or more uncooked ingredients.
Use lemon as an adjustment, not a topping flood
One tablespoon is a starting point. Stir it through, taste a cooled spoonful and add another small squeeze only if the soup still tastes flat. Salt and acidity do different jobs; adding more lemon does not always fix underseasoning. Likewise, salty broth may mean the recipe needs no additional salt at the end.
Serving and ingredient notes
A small bowl works as a starter; a larger portion can anchor lunch with bread or another accompaniment of your choice. The approximate yield refers to the finished pot, not a guaranteed amount in every pictured bowl. Divide according to appetite rather than treating the image as a portion measurement.
Canned great northern beans can replace cannellini beans in the same drained quantity, though the texture may differ. This method assumes fully cooked beans, not dried beans added directly to the pot. Do not substitute uncooked dried beans without cooking them separately by an appropriate method first.
The listed soup contains no added milk, cream or cheese. Check the actual broth, canned beans and any accompaniments for allergens and dietary requirements; this is not a blanket allergy-free claim. The optional parsley shown in the serving image is included in the ingredient list. No nutritional analysis is provided.
Cool in small containers; reheat only what you need
Divide leftover soup into shallow containers and refrigerate promptly at 40°F (4°C) or colder. Do not leave the entire pot on the counter waiting to cool completely. Refrigerate within 2 hours of cooking, or within 1 hour when the surrounding temperature exceeds 90°F (32°C). Discard soup left out beyond those limits.
Use refrigerated leftovers within 3–4 days, or freeze for longer storage. Label containers with the preparation date and leave room for expansion when freezing. Thaw in the refrigerator. Store the reserved topping separately if convenient; it is subject to the same safe handling limits.
Reheat soup to 165°F (74°C) throughout, checking with a food thermometer. On the stove, bring the soup to a rolling boil, stirring frequently so the bottom does not scorch and the center heats evenly. In a microwave, use a microwave-safe container, cover loosely, stir and check several places. Add a little water if the soup has thickened. Reheat the topping thoroughly too, or omit it from the reheated bowl.
Planning a few meals ahead? Bake a pan of apple-cinnamon baked oatmeal for breakfast while this soup covers lunch.
Method and food-safety references
Health Canada's cauliflower and bean dip illustrates the compatible roasted-cauliflower and blended-white-bean technique. This soup uses its own quantities and cooking steps. Storage guidance follows USDA's advice on handling leftovers. Reheating guidance follows FoodSafety.gov's temperature chart and USDA's reheating guidance.
Recent Posts
-

Poland and Indonesia: Check the Top Band Before the Size
Poland and Indonesia both use red and white in two equal horizontal bands. The quickest distinction …Nov 18th 2026 -

Sweden and Finland: Compare the Crosses at the Same Height
Sweden’s yellow cross on blue and Finland’s blue cross on white share a familiar arrangement: the up …Nov 18th 2026 -
Charcoal-Kettle Savoy Cabbage Wedges with Mustard Vinaigrette
Savoy cabbage’s crinkled leaves catch a little oil and brown at their edges, while the thicker base …Nov 18th 2026