
Grill Marks on Steak: Enjoy the Pattern, Cook by Temperature
A steak with a neat crosshatch looks inviting. There is nothing wrong with wanting those marks: they can be part of the pleasure of cooking and presenting a meal. The useful distinction is between adding a pattern while the steak cooks and continuing to cook an otherwise finished steak just to perfect its appearance.
Aim for an appealing browned surface, add the pattern if you want it, and use a food thermometer to decide whether the meat has reached its safe cooking endpoint. These are three different checks. A handsome exterior cannot tell you what is happening inside.
This researched technique guide is inspired by charcoal-kettle barbecue. It does not promise a particular cooking time or result.
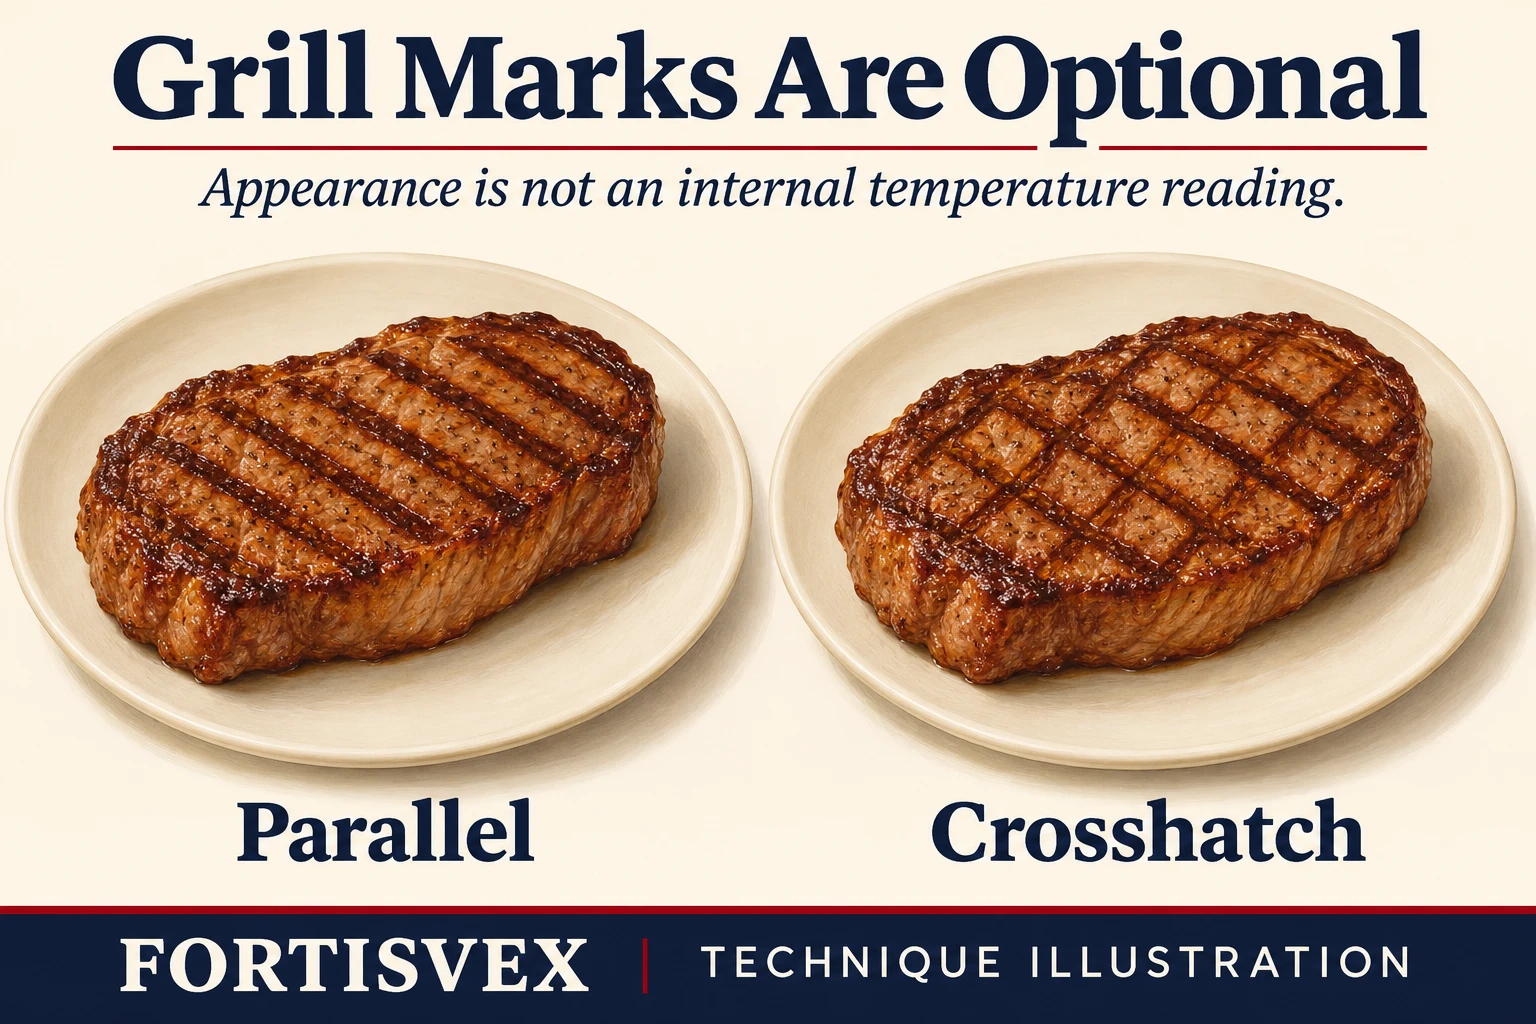
What the pattern tells you—and what it does not
The stripes record where the steak meets the cooking grate. Change the steak’s orientation on the same face and the next set of lines can cross the first. That is the basic idea behind a crosshatch. You do not need every square to look identical for the steak to be worth serving.
Browning contributes to the cooked surface’s flavor and appearance. The Maillard reaction is one part of that browning. It does not require you to draw a perfect diamond pattern, and a pattern is not a measurement of how evenly browned the whole surface is. Equally, a dark stripe is not a thermometer reading. Keep the presentation decision separate from the decision to stop cooking.
Rotate for the pattern; flip to cook the other face
Two movements are easy to confuse. Rotating changes the direction of the steak while the same face stays toward the grate. Flipping turns the other face toward the heat. Crosshatching uses both, but they do different jobs.
- Prepare the grill and a cooler finishing area. Follow the operating instructions for your equipment. Preheat and clean the cooking grate. A setup with direct heat and an indirect area lets you mark the surface and then finish cooking away from the strongest heat.
- Choose the first orientation. Place the steak diagonally across the grate. Let the first set of marks develop rather than sliding the meat repeatedly from place to place.
- Rotate on the same face. Lift and turn the steak to a second diagonal orientation. Thinking of its long axis first pointing toward 10 o’clock and then toward 2 o’clock is one way to picture the change. Keep that same face down to make crossing lines.
- Flip, then manage the rest of the cook. Turn the steak over to cook the second face. You may repeat the pattern there, but do not let symmetry dictate extra cooking. Use the indirect area when the surface is marked and the meat still needs more cooking.
- Check the meat, then rest it. Use a food thermometer and the appropriate safe temperature for the food. For whole beef steak, the minimum is 145°F followed by at least a 3-minute rest. Do not remove it below that minimum on the assumption that resting will supply the missing temperature.
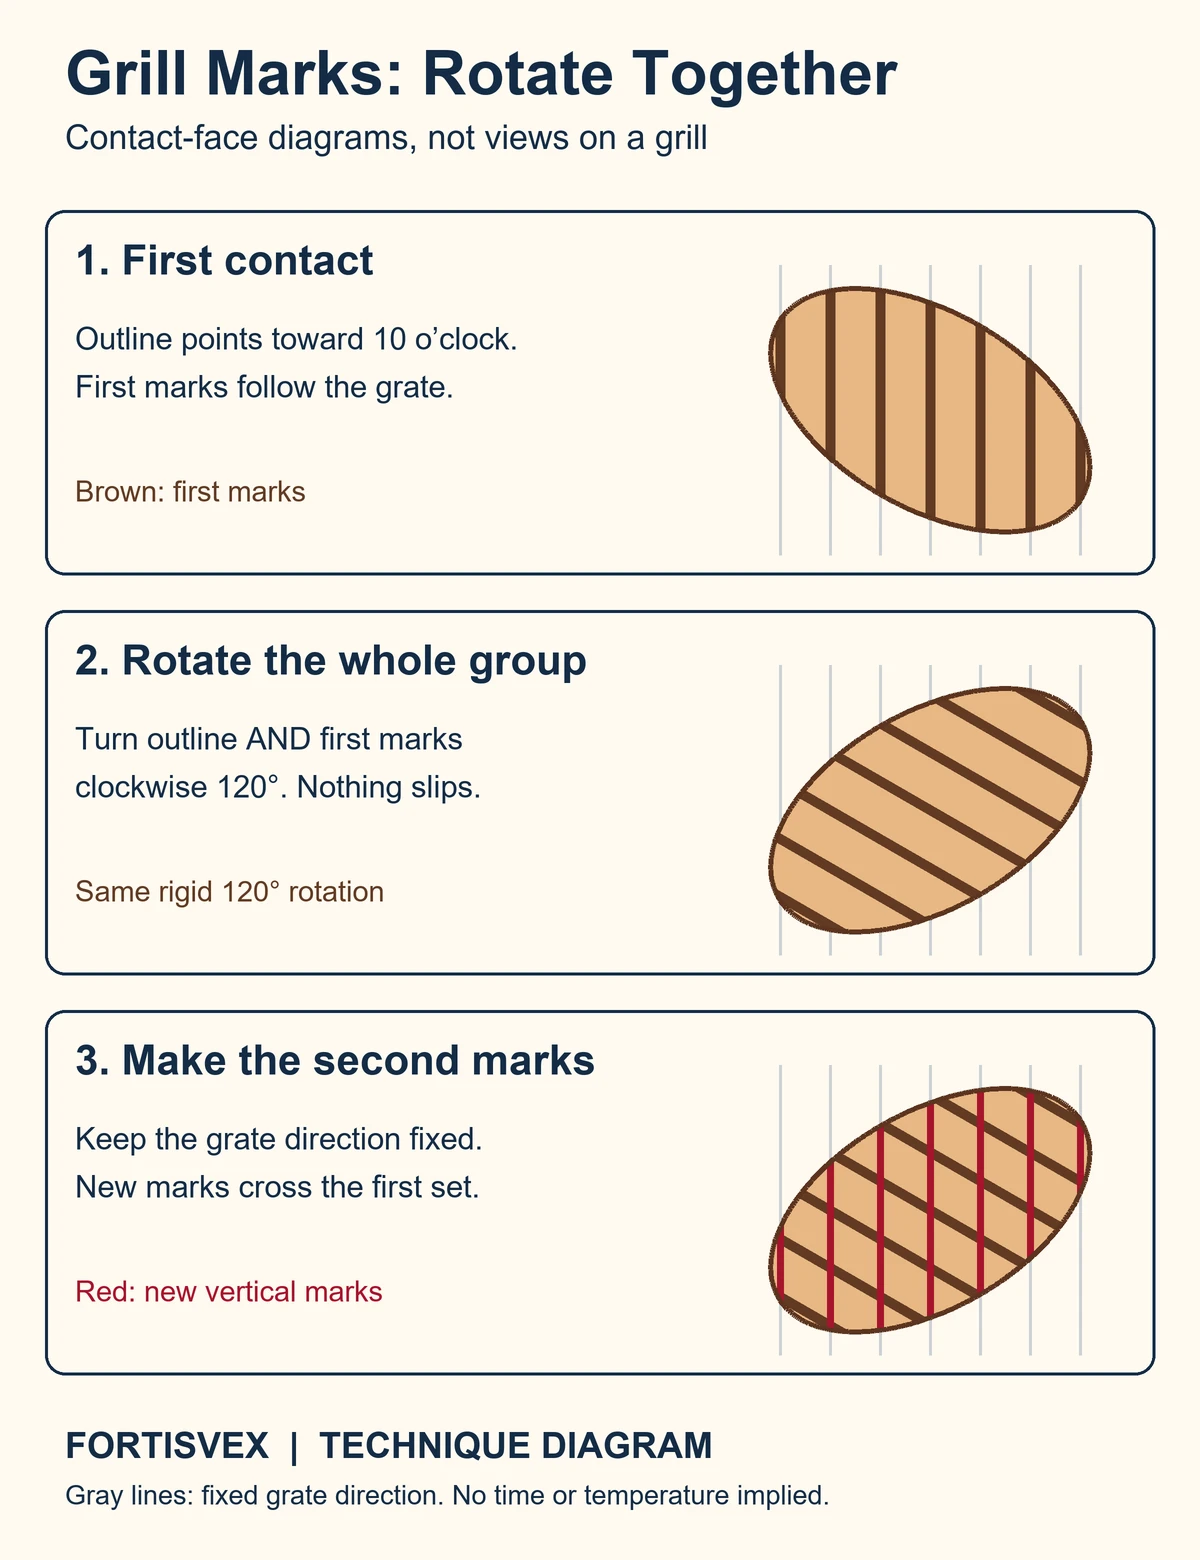
The clock-face example explains a movement, not a cooking schedule. A photograph of a finished steak cannot establish how many minutes your steak needs. Nor should an eight-minute example in a technique guide become a rule for every cut, thickness or grill. If you use a timer, treat it as a reminder to check progress rather than proof that the center is ready.
Make the thermometer the final judge
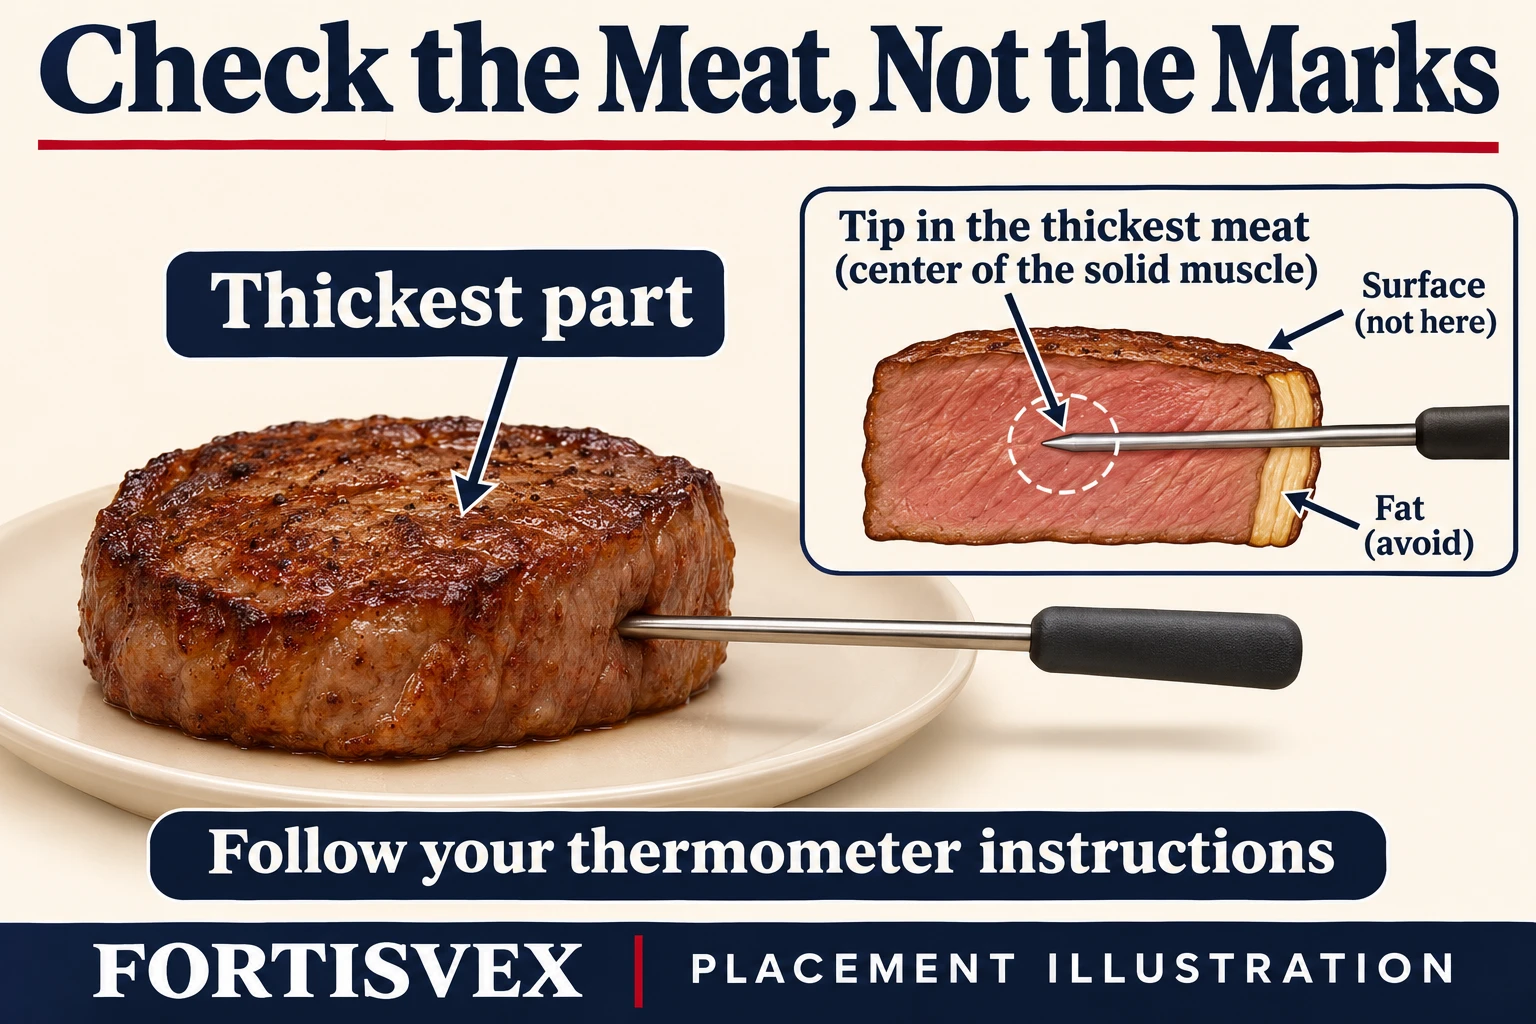
Have the food thermometer ready before cooking. Follow its instructions for insertion depth, sensing location, response time and cleaning; a probe that is used incorrectly cannot answer the question you are asking. A grill’s temperature display measures the cooking environment, not the internal temperature of the steak.
Government guidance calls for placing a thermometer in the thickest part of the food, away from bone, fat and gristle. Check each steak rather than transferring one steak’s reading to the rest of the platter. If a cut is too thin for your thermometer’s required sensing depth, consult the instrument instructions instead of treating surface contact as an internal measurement.
The 145°F-and-rest guidance here concerns whole beef steaks. It is not a universal target for everything with grill marks: ground meat has a 160°F minimum, while poultry requires 165°F. Check the guidance for the actual food rather than borrowing the steak target for burgers or chicken.
When the appearance and the temperature disagree
- The marks look good, but the steak has not reached its endpoint.
- Keep cooking. The direct-to-indirect approach separates the surface-marking stage from finishing the meat. Do not serve it simply because the outside looks complete.
- The steak has reached its endpoint, but one set of lines is faint.
- Accept the imperfect pattern. You can present the more attractive face upward without adding another round of cooking solely for a photograph.
- The first face is marked, but the second is less tidy.
- There is no requirement that both sides match. A pleasing presentation is a choice, not a second safety standard.
Those decisions are more useful than judging success by an exact number of diamonds. The goal is a steak you want to eat, with a safe cooking endpoint—not a pattern achieved at any cost.
Keep the serving step clean
Prepare a clean platter and clean serving utensils before the steak is ready. Do not put cooked meat back onto the unwashed plate that held it raw. Keep raw juices away from ready-to-eat food, and keep meat refrigerated until preparation. If you marinate it, do that in the refrigerator; reserve any serving portion of marinade before it touches raw meat.
Refrigerate perishables within 2 hours, or within 1 hour when the outdoor temperature is above 90°F. Do not let arranging the platter or taking pictures turn into a long delay in safe handling.
Plan the occasion before you light the grill
If a statehood anniversary gives your gathering its theme, use the FORTISVEX state-birthday calendar while choosing the date. That leaves the cooking session focused on the food rather than last-minute party planning.
For the display itself, the state flag shopping map offers a geographic starting point, while the state flag collections let you browse the available categories. These are gathering and display resources, not cooking equipment recommendations or claims that a flag belongs beside a hot grill.
Enjoy the crosshatch if you like it. Let the browned surface guide your presentation, and let the thermometer and required rest guide when the steak is ready to serve.
Recent Posts
-
Wigwag Signals
Civil War signal flags needed to be seen, yet visibility could invite interception. Albert J. Myer p …Nov 5th 2026 -
Norway’s Flag in 1821: Agreement on Design, Disagreement on Authority
In 1821, Norway’s parliament and king accepted the flag’s design while disputing who could determine …Nov 5th 2026 -
Reading Beach Warning Flags: Check the Local Sign, Not Just the Color
A beach warning flag is easier to recognize than to interpret. You may remember a color from anothe …Nov 5th 2026